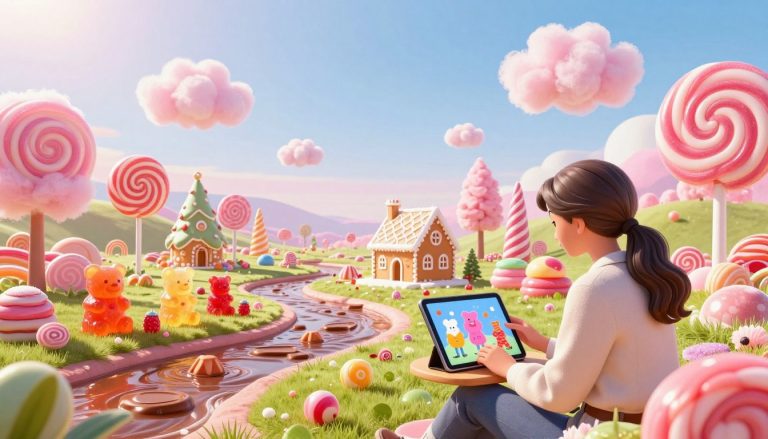
Bubblegum Visuals Explained: Sub-Surface Light Scattering Guide
Ever wondered how light interacts with translucent surfaces to create that soft, vibrant glow? To get realistic bubblegum visuals in your 3D projects, you need more than basic shaders. You need to understand how light scatters beneath a surface.
Scientists use Optical Coherence Tomography (OCT) to study these effects. OCT gives us noninvasive, high-resolution images of the human eye. It shows how light moves through complex layers. This tech proves that seeing depth is key to capturing light’s true behavior.
You can use these principles in your digital art to mimic natural translucency. Learning these techniques lets you create stunning, lifelike renders that grab attention. This guide is your go-to for mastering these complex effects in your projects.
Key Takeaways
- Sub-surface scattering is the secret to achieving a soft, realistic glow in 3D models.
- OCT imaging provides the scientific foundation for understanding light penetration in biological tissues.
- Depth-resolved measurements are critical for accurate light simulation in digital environments.
- You can replicate organic translucency by studying how light interacts with layered surfaces.
- Mastering these rendering techniques will significantly elevate the quality of your visual projects.
Understanding the Physics of Sub-Surface Scattering
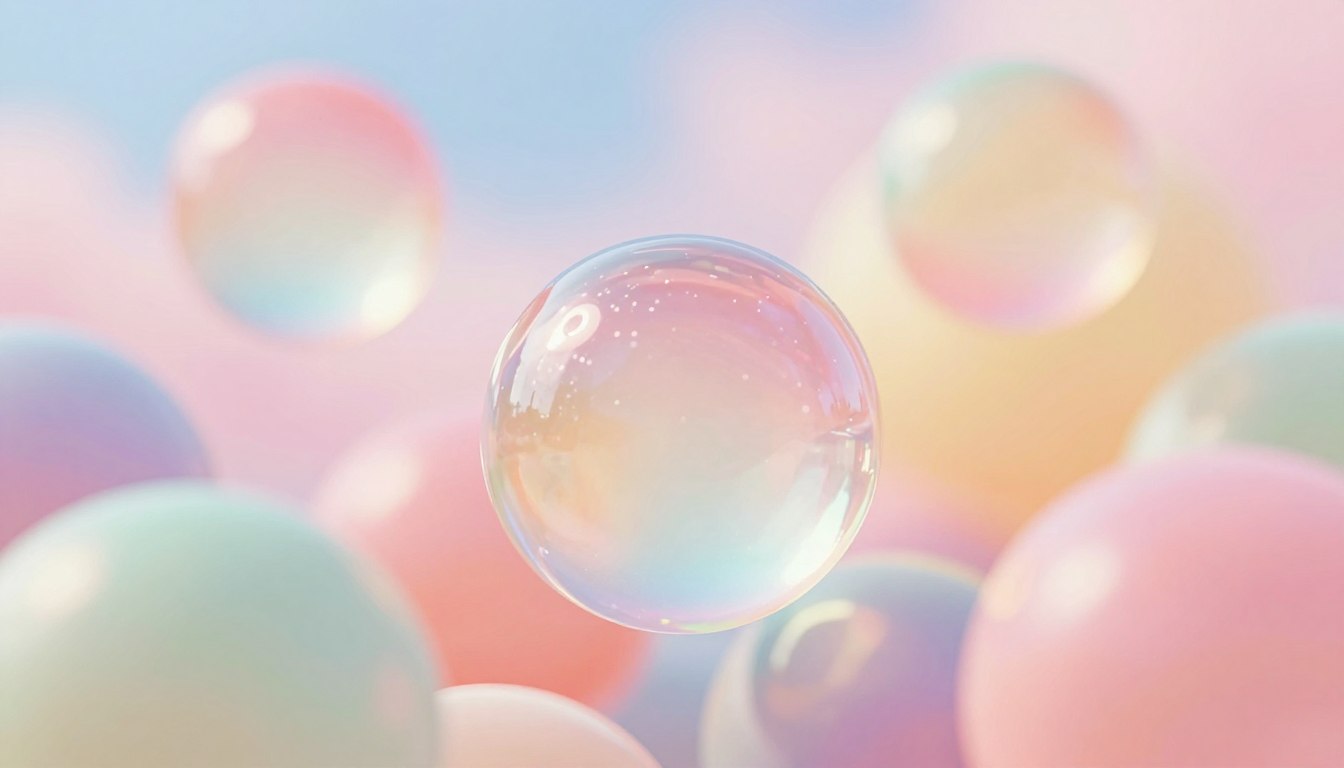
The secret to vibrant digital art lies in understanding how photons and translucent materials interact. When light hits an object, it doesn’t just bounce off. Instead, it goes into the material, scatters inside, and comes out somewhere else.
This process, known as subsurface lighting, is key for realistic skin, wax, or plastic effects. By mastering these principles, you can control how your digital models react to light in a virtual world.
How Light Interacts with Translucent Materials
To grasp modern rendering, it’s helpful to look at the history of imaging technology. Like ultrasound imaging, which started in the 1920s, digital rendering tracks how waves move through a medium.
In 3D graphics, subsurface lighting mimics this journey. Photons go into the mesh, bounce off particles inside, and lose energy before leaving. This is what makes translucent objects look soft and glowy.
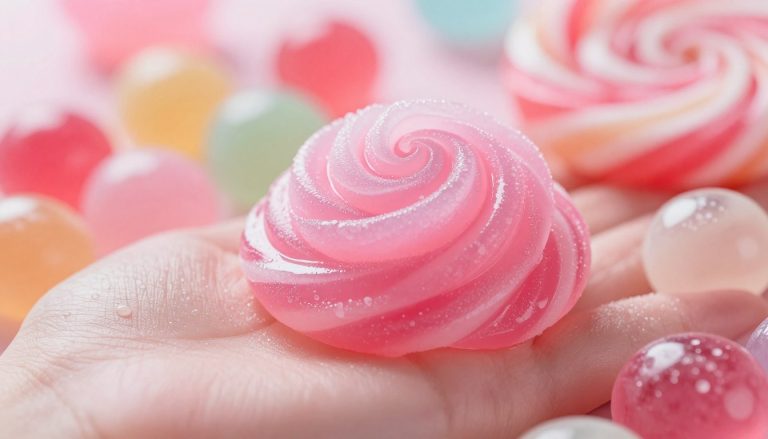
Defining the Bubblegum Aesthetic in Digital Art
The bubblegum aesthetic is all about bright colors and a certain light diffusion. It captures the look of soft, pliable materials that seem to hold light inside. To get this look, you need to balance the scattering radius with the material’s base color.
When you use subsurface lighting right, your objects’ edges become softer and more natural. This avoids the harsh, plastic look of basic renders. By focusing on how light bleeds through, you can achieve that vibrant, candy-like quality of the bubblegum style.
Preparing Your 3D Assets for SSS
The key to great sub-surface scattering starts with your 3D geometry. Before adding complex shaders, make sure your 3D assets are clean and well-organized. This step helps avoid common mistakes and makes sure light acts as it should in your model.
Optimizing Mesh Topology for Light Penetration
Good mesh quality is crucial for light penetration. You should aim for uniform polygon density to keep scattering calculations consistent. Stay away from non-manifold geometry or overlapping faces, as they can ruin the look of translucency.
High-quality mesh topology helps the rendering engine accurately trace rays through your object. If your mesh is too sparse, the light won’t have enough data for the soft glow you want. Always clean up your mesh to remove stray vertices and make sure normals face outward.
“Geometry is the canvas upon which light paints its story; if the canvas is flawed, the masterpiece will never emerge.”
Setting Up Proper Scale and Real-World Units
Many artists struggle with scattering because they overlook the importance of real-world units. Sub-surface scattering algorithms work based on actual object size. If your character is too big, the scattering radius will be too small.
Always check that your scene scale matches the object’s intended size in centimeters or meters. When your model is scaled right, scattering settings will feel natural. This simple step can save a lot of time during look-development.
| Issue | Impact on SSS | Recommended Fix |
|---|---|---|
| Non-manifold edges | Black artifacts | Merge vertices |
| Inconsistent scale | Unpredictable glow | Apply scale transforms |
| High-density triangles | Slow render times | Retopologize mesh |
| Inverted normals | Light leaking | Recalculate normals |
Selecting the Right Rendering Engine
Modern rendering engines have made huge strides, thanks to the semiconductor industry’s fast progress. These advancements mean better performance and lower costs. Artists can now simulate complex light behaviors more accurately and quickly.
Choosing the right software is crucial for your bubblegum visuals. Each engine has unique tools for handling light scattering. The right choice depends on your artistic goals.
Configuring Arnold for Realistic Skin Tones
Arnold is known for its excellent sub-surface scattering in movies. To get realistic skin, tweak the Standard Surface shader’s subsurface settings. Adjusting the mean free path and scattering color helps light act like it does in human skin.
Make sure your scale settings match your scene units. Arnold needs precise physical measurements to simulate light’s journey through your 3D models. Correct settings avoid the “plastic” look often seen in bad scattering setups.
Utilizing Cycles for Vibrant Bubblegum Effects
Cycles is great for artists wanting a bright, stylized look. Its path-tracing tech is perfect for the bubblegum look. You can control the scattering radius for soft, glowing edges.
Using the Principled BSDF node makes adjusting subsurface weight easy. This workflow is fast, ideal for quick creative feedback. It’s a top choice for those who value speed without losing visual quality.
Leveraging Octane Render for High-End Translucency
Octane Render is a top choice for translucency thanks to its GPU-accelerated power. Its spectral rendering ensures light interactions are true to life. Octane’s medium nodes give detailed control over absorption and scattering.
This engine shines when you need to render fine details accurately. Its GPU speed lets you quickly refine your material nodes to get the perfect look.
| Rendering Engine | Best Use Case | SSS Performance | Ease of Use |
|---|---|---|---|
| Arnold | Cinematic Realism | High | Moderate |
| Cycles | Stylized/Vibrant | Medium | High |
| Octane | High-End Detail | Very High | Moderate |
Mastering Bubblegum Visuals Through Material Nodes
Creating vibrant bubblegum visuals starts with precise adjustments in your software’s node graph. Modern 3D apps offer powerful tools to control light travel through surfaces. By tweaking these nodes, you get full control over your digital objects’ internal scattering.
Adjusting the Subsurface Color and Radius
The subsurface color node is key for your material’s glow. Choose a color that matches your primary diffuse color for a candy-like look. Adjusting the radius is also crucial, as it shows how far light goes before leaving the mesh.

A too-low radius makes the object look opaque and dull. On the other hand, a too-high radius can make it seem like thin, glowing gas. Finding the perfect balance takes trial and error to match real-world material density.
Balancing Specular Reflections and Roughness
After setting up scattering, focus on the surface response. High-quality bubblegum visuals need a balance between specular highlights and surface roughness. A glossy finish can make the object seem more translucent by creating sharp outer reflections.
Use a noise map or procedural texture to mix up the roughness. This adds organic realism by breaking up perfect reflections. Properly balancing these settings makes your material feel real, not flat or synthetic.
Step-by-Step Guide to Creating Soft Skin Effects
To make soft skin effects, you need a clear plan. It’s like how doctors use special images to check their work. By being careful with your digital work, you can make it look real. This way, your models won’t look flat or fake.
“The beauty of digital realism lies in the subtle dance between light and the internal structure of the material.”
Step 1: Establishing the Base Diffuse Layer
Starting with a strong base diffuse layer is key. This layer is the start of how light interacts with your model. Make sure your albedo maps are clean. This lets you control the lighting during the final steps.
Step 2: Applying the Subsurface Scattering Map
After setting your base, add a subsurface scattering map. This map shows how light moves through the soft skin. It’s important for making the model look like it has depth, not just a solid surface.
Step 3: Fine-Tuning the Backlight Scattering
The last step is to adjust the backlight scattering. This makes the model glow like it does in real light. By tweaking these settings, you get a soft, translucent effect. This is crucial for a polished soft skin look.
Advanced Texturing Techniques for Depth
Advanced texturing techniques help turn flat digital models into lifelike surfaces. To achieve photorealism, you need to go beyond simple colors. Adding layers of complexity makes your materials feel real.
Layering Micro-Details for Organic Realism
Organic surfaces are never perfectly smooth. Adding micro-details like pores and wrinkles makes them more believable. These small features also catch light in unique ways, adding depth to your model.
Layering these details is key. Use high-resolution displacement maps to change the geometry. Normal maps add surface variation without increasing polygons. This multi-layered approach creates a tactile quality.
Using Procedural Maps to Control Scattering Density
Light travel through your material is as important as its surface. Procedural maps help control scattering density just like an integrated tracking beam. This ensures your material doesn’t look like a uniform plastic block.
By mapping subsurface radius and color values, you can control light penetration. Masks can allow deeper light in thinner areas, like ears or fingertips. This keeps subsurface scattering effects consistent with your asset’s structure.
| Texture Type | Primary Function | Impact on SSS |
|---|---|---|
| Displacement Map | Adds physical depth | High (shadows/highlights) |
| Scattering Density Map | Controls light travel | Critical (translucency) |
| Roughness Map | Surface finish | Moderate (specular) |
| Normal Map | Micro-surface detail | Low (surface lighting) |
Lighting Strategies to Enhance Translucency
Light placement is key for realistic subsurface lighting in digital projects. By adjusting light sources, objects can seem to glow from inside. This is crucial for a professional look in your final images.
Positioning Backlights to Trigger SSS
To show off translucency, place lights behind your subject. This method, called backlighting, makes light pass through the mesh, causing subsurface scattering. A strong light source behind your object brings out the material’s thin edges and inner density.
Try different distances and light intensities for the best look. If the light is too far, the effect might be weak. Proper placement lets light go through the surface, creating a soft, bright glow typical of subsurface lighting.
Managing Global Illumination for Soft Shadows
Backlighting gives the glow, but global illumination sets the scene’s mood. Harsh shadows can ruin the translucent look you’re aiming for. Adjust your global illumination to keep shadows soft and spread out.
A high-quality bounce light setup fills in dark spots without losing details. This balance is key for organic realism. By fine-tuning these settings, your subsurface lighting will stand out, making your image polished and professional.
Common Pitfalls When Rendering Translucent Surfaces
Getting perfect translucency can be tricky. Even with the right settings, problems can pop up. It’s like the OCT system needed lots of testing before it was okay for use. Your 3D renders need the same kind of check to look professional and realistic.

Fixing Over-Saturated or Glowing Artifacts
When making soft skin, you might see unnatural, glowing edges or too bright colors. This often happens if the scattering radius is too big for your model. If your light absorption values are off, the material might look like it’s glowing instead of scattering light.
To fix these problems, try these steps:
- Reduce the scattering radius to fit your object’s size.
- Make sure your light intensity isn’t too high, causing the color to get lost.
- Use a color ramp or texture map to control where the scattering happens.
Troubleshooting Noise in Scattering Calculations
Noise can ruin a clean soft skin look. Scattering calculations are hard on computers, and not enough samples can make shadows look grainy. If your render looks speckled, it’s because the engine is having trouble with the light paths through dense geometry.
Here’s how to improve your render:
- Up the subsurface scattering samples in your settings.
- Change the ray depth to let light bounce better through the material.
- Make sure your mesh is clean, as messy geometry can cause big errors.
By tackling these common problems, you can keep your final look clean. Keep testing and tweaking to get the quality you want for your soft skin projects.
Optimizing Render Times for Complex SSS Scenes
Getting high-quality 3D renders is all about finding the right balance. Complex light scattering scenes can be very demanding. Smart optimization helps keep your workflow smooth while getting that soft skin look just right.
Using Render Passes for Compositing Control
Breaking your scene into render passes can save a lot of time. Instead of redoing the whole image for small changes, you can work on subsurface scattering separately.
This method lets you adjust the scattering effect in your compositing software. It means you don’t have to wait for long re-renders. This is crucial for perfecting soft skin in professional projects.
Balancing Sampling Rates and Ray Depth
Controlling sampling rates is key to reducing noise without losing quality. Focus your samples where light interaction is most complex. Don’t apply high settings everywhere.
Adjusting ray depth also helps. It stops the engine from doing unnecessary light bounces. Just like how OCT systems have gotten smaller and cheaper, you can optimize your render settings for better quality and speed. Efficiency is always possible with the right settings.
| Optimization Strategy | Primary Benefit | Impact on Workflow |
|---|---|---|
| Render Passes | Non-destructive editing | High time savings |
| Adaptive Sampling | Noise reduction | Balanced performance |
| Ray Depth Limits | Faster calculation | Improved soft skin clarity |
Post-Processing for the Final Bubblegum Look
Post-processing is the last step to turn a raw 3D image into a stunning work of art. It’s where you fine-tune your bubblegum visuals to make the whole image feel complete. With the right adjustments, a simple render becomes a masterpiece.
Color Grading to Achieve Vibrant Hues
Color grading is key to getting those bright, candy-like colors that grab your attention. You should tweak your mid-tones to warmer pinks or cool cyans. This brings out the playful nature of your scene.
Using lookup tables (LUTs) makes this easier. A custom LUT keeps your colors consistent across all frames. It helps you achieve your bubblegum visuals vision. Always check your levels to keep colors balanced and details sharp.
Adding Bloom and Glow to Soften Edges
Subtle bloom and glow effects make your image feel softer and more dreamy. They mimic how light scatters in real life, giving your objects a softer, more organic feel. Adjust the glow’s intensity to match your scene’s lighting.
When adding these filters, aim for a low threshold to focus on the brightest parts. This approach gives your bubblegum visuals a professional finish. A gentle touch is what separates a clean image from one that’s too processed.
Industry Applications of Subsurface Lighting
Understanding light behavior is key in modern digital art. Just like OCT changed medical studies, subsurface lighting has changed digital art. It makes digital surfaces look more real and alive.
Character Design in Animation and Gaming
In animation and gaming, designers use subsurface lighting to make characters seem real. This technique makes characters look more like people than dolls. It’s crucial for creating believable characters.
Today’s game engines can handle these complex light effects in real-time. This means characters can look great in any light. You’ll see soft shadows around faces and fingers in top games. This makes characters look consistent and real.
Product Visualization for Cosmetics and Food
Commercial sectors also use advanced light effects to grab attention. For cosmetics and food, accurate light effects make products look appealing. The way light goes through a fruit or cream affects how good it looks.
The table below shows how different fields use these light effects:
| Industry | Primary Goal | Key Benefit |
|---|---|---|
| Animation | Organic Skin Realism | Emotional Connection |
| Gaming | Dynamic Translucency | Immersive Experience |
| Cosmetics | Texture Appeal | Product Desire |
| Food | Freshness Simulation | Visual Appetite |
Using these light effects makes your digital work stand out. Whether it’s a hero or a luxury item, subsurface lighting is essential. It turns technical details into engaging stories.
Conclusion
To get great bubblegum visuals, you need both skill and creativity. Now, you know how to use advanced light techniques in your 3D scenes. This will make your work look amazing.
Keep practicing with tools like Arnold, Cycles, and Octane Render. Every project is a chance to get better at light and depth. It’s all about learning and improving.
Don’t worry if things don’t work out at first. Changing your settings can lead to amazing results. It’s all about finding the right way to make things look real.
Show off your work to get feedback and ideas. Growing as an artist means trying new things and learning from others. Keep making, testing, and getting better at telling stories with your visuals.
FAQ
What exactly defines the aesthetic of bubblegum visuals in 3D rendering?
Bubblegum visuals are known for their bright, over-the-top colors and clearness. They use light scattering, like OCT, to make things look soft and chewy. This makes them different from hard, solid objects.
Why is subsurface lighting essential for achieving a realistic soft skin effect?
Subsurface lighting makes skin look real by simulating how light moves inside it. It helps avoid the look of painted plastic. This is key for a natural glow, seen in top movies from Pixar or DreamWorks.
Which rendering engine should you choose for the best subsurface scattering (SSS) results?
Choosing depends on your needs. Arnold is top for realistic skin with its SSS. Octane Render is fast and accurate for high-end looks. Cycles in Blender is great for vibrant, stylized effects at a lower cost.
How do you prevent your renders from looking “waxy” or overly glowing?
Incorrect SSS settings can make things look wrong. Use real-world units in software like Maya or Cinema 4D. Fine-tune your settings to avoid too much glow and keep details sharp.
Can you use procedural textures to enhance the realism of soft skin?
Yes, procedural textures in Adobe Substance 3D Painter or Foundry Mari can help. Add micro-details like pores and wrinkles. This makes your skin look more real and detailed.
How can you optimize render times when working with complex subsurface lighting?
Light scattering takes a lot of work, but you can speed it up. Balance sampling rates and ray depth. Use render passes for compositing to adjust effects without re-rendering, saving time.
What industries benefit most from mastering these translucency techniques?
These skills are key in gaming, animation, and product design. They help show texture in cosmetics for L’Oréal or Estée Lauder. In food and beverage, they’re crucial for digital marketing to make things look appealing.