
Negative Prompt Library to Keep Outputs Clean
Have you ever wondered why some Stable Diffusion images look polished while others feel noisy and unfinished?
You can cut hours of trial and error by using a focused negative prompt library. The default resolution for Stable Diffusion v1 is about 512×512, which often needs extra refinement to reach high quality. Learning how to state what you don’t want in a generation guides the model away from common artifacts.
Think of negative prompts as a filter. They tell the diffusion model to ignore noise, odd limbs, and low-quality details. With clear instructions, your output becomes more consistent and ready for modern design work.
Key Takeaways
- Use a negative prompt to steer Stable Diffusion toward clean images.
- Defining unwanted elements saves you significant time during generation.
- A well-crafted prompt filters artifacts and improves final quality.
- Stable Diffusion’s default 512×512 canvas often needs refinement.
- Mastering a negative prompts library yields consistent, professional output.
Understanding the Role of Negative Prompts
When you define exclusions up front, the model spends less time guessing and more time refining. A negative prompt is a concise instruction set that tells the stable diffusion engine which concepts or visual elements to exclude.
The diffusion process begins with noise and then refines toward your goal using the prompt you provide. Clear exclusions give you more control over that refinement. This helps the model avoid common artifacts that spoil an image.
“Treat these exclusions like a chisel for your digital marble.” With focused guidance, you chip away at flaws and steer the engine away from unwanted patterns. Different models respond in their own ways, so test variations to learn how your model interprets each instruction.
- Use a concise negative prompt to block specific errors.
- Keep instructions simple to improve consistency.
- Iterate per model to gain better control over output.
Essential AI Porn Negative Prompts for Quality Control
Define what must never appear in a generation before you hit the run button. Setting exclusions up front saves time and helps you meet professional standards for visuals and safety.
General Quality Standards
Keep instructions tight and focused. Use a short negative prompt to remove common flaws like jpeg artifacts, blurry visuals, or unwanted text. That preserves image quality and reduces manual cleanup time.
Tell the model to avoid low-resolution outputs, grainy textures, watermarks, and logos. This ensures landscapes and portraits maintain crisp detail and accurate colors.
Filtering Inappropriate Content
Implementing ai porn negative prompts is a necessary step when you must filter explicit content. These instructions help block nudity, sexual acts, and NSFW results so your work stays appropriate for clients or public platforms.
- Define banned elements clearly.
- Keep exclusions concise to improve repeatability.
- Test and refine the wording to match your model and workflow.
Refining Anatomy and Human Features
Clear anatomy rules make the difference between believable characters and odd, distorted results. Achieving correct anatomy is one of the toughest parts of image generation, but a targeted negative prompt can help you fix it fast.
Tell the model to avoid malformed limbs and extra limbs to preserve proportion. Short, direct prompts that list errors — such as “malformed limbs, incorrect joints, extra fingers” — guide stable diffusion away from common mistakes.
Focus on structural integrity. When you use negative prompts to address anatomy, you gain better control over pose, balance, and realistic features. That control reduces time spent on manual fixes later.
Use a small checklist in your prompt set: correct limb count, natural joint angles, and consistent proportions. These cues prevent disfigured or mutated body parts and ensure characters have the right number of limbs.

- List common failures like extra limbs or fused fingers.
- Keep exclusions concise to improve repeatability.
- Iterate quickly to see how diffusion respects your rules.
Achieving Realism in Your AI Generations
To make images read like real photographs, you need to exclude telltale computer artifacts up front.
Eliminating Digital Artifacts
Start with a concise negative prompt that lists common artifacts: jpeg compression, banding, harsh lighting, and visible text or branding. Clear exclusions keep your visuals focused and improve perceived quality.
Include lighting rules in your prompt to prevent overexposure, flat shadows, or odd highlights. Consistent lighting preserves realism and prevents features from looking painted or artificial.
Use an upscaling tool like Aiarty Image Enhancer to restore details. Upscaling from 1024px to 4K keeps fine texture and prevents soft edges that break realism.
- Avoid compression artifacts and stray text for cleaner images.
- Block unnatural shadows to keep lighting believable.
- Upscale with a dedicated tool to recover realistic details.
Combine careful prompt wording with high-quality upscaling and you’ll get landscape and portrait generation that matches real-world photography.
Optimizing Anime and Stylized Art
A clean anime image depends on steering diffusion away from photorealistic textures and 3D lighting. When you add clear exclusions to your prompt set, the model keeps to flat shading, crisp line work, and bold color fields.
Keep directions short and focused. Tell the system to block photorealistic, 3D, and textured skin to preserve the intended 2D look. This prevents soft shadows, glossy surfaces, and complex reflections from appearing in your art.
Use targeted wording to remove unwanted elements like text overlays, realistic grain, or complex lighting setups. That produces images that feel true to anime style and ready for line art or cel shading workflows.
- Block photorealistic features so colors stay flat and vibrant.
- Avoid 3D lighting to keep shading simple and consistent.
- Exclude stray text or logos to prevent clutter in final art.
With these focused negative prompts, you ensure each anime piece retains stylistic clarity. The result is consistent, high-quality art that matches your creative vision while reducing cleanup time.
Managing Facial Features and Expressions
Clear rules for faces help the model render expressions that read naturally at a glance.
Managing facial features is critical for portraits. Use a concise prompt that lists what to avoid so the face stays well proportioned. This reduces asymmetry and prevents warped mouths or fused features.
Focus on the eyes first. Make a short negative prompts line to block common eye errors like cross-eyed pupils, extra irises, or mismatched pupils. That helps your images keep a believable gaze.
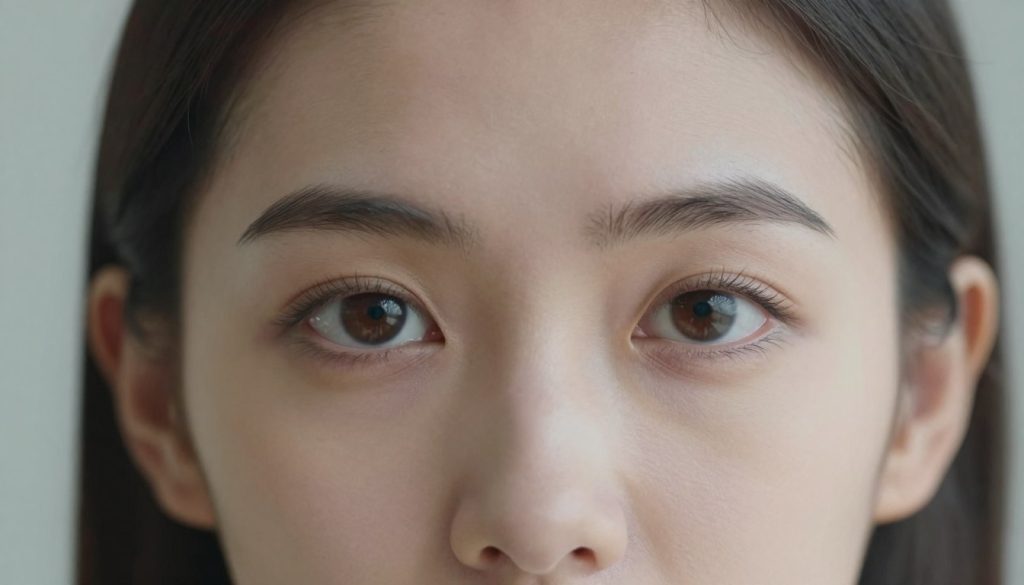
“Good facial guidance turns a passable render into a convincing portrait.”
- Include face in your exclusions to prioritize expression and clarity.
- List specific faults: asymmetrical eyes, fused features, poor mouth shape.
- Test short, repeatable lines so diffusion learns the rules quickly.
| Issue | Short exclusion | Effect on portrait |
|---|---|---|
| Asymmetrical eyes | avoid asymmetrical eyes | Balanced gaze and natural look |
| Fused features | no fused facial features | Clear contours and proper separation |
| Cross-eyed pupils | no cross-eyed pupils | Realistic eye direction and focus |
Perfecting Hands and Fingers
Small flaws in hands draw the eye and ruin otherwise strong images, so you must steer the model away from common errors.
Hands and fingers need explicit rules in your prompt set. Include short exclusions for fused digits, extra fingers, and malformed joints. That reduces retries and saves time when you generate portraits or full-body art.
Addressing Fused Digits
List exact failures like “fused fingers” or “merged digits” in a compact line. This tells stable diffusion to avoid those elements and improves final quality.
Correcting Limb Proportions
Use a short prompt that blocks disconnected arms, oddly long forearms, or awkward wrist angles. Clear exclusions help maintain natural limb scale and proportional features.
Improving Grip and Gesture
Define proper grip and finger spread to keep gestures believable. A brief set of rules reduces malformed hands and keeps ai-generated images usable for design or publication.
| Issue | Short exclusion | Result |
|---|---|---|
| Fused fingers | no fused fingers | Separate digits, clear detail |
| Extra fingers | avoid extra fingers | Correct finger count |
| Disconnected arm | no disconnected limbs | Natural joint connection |
“Focus on hands early; they define believable action and character.”
- Include hands and fingers in your prompts to cut generation time.
- Keep lines short and repeatable for consistent results.
Advanced Techniques for Prompt Weighting
Prompt weighting gives you direct control over which cues the model honors most. This lets you push or pull attention from specific image elements during diffusion.
Use weighted tokens in Automatic1111 to refine the impact of a negative prompt. The syntax (word:1.5) raises focus on a term so the model treats it as higher priority.
Advanced users can leverage weighting to force removal of stubborn artifacts or unwanted text. You change intensity without rewriting your entire prompt set. That saves time and improves final quality.
- Apply (word:1.5) to terms that must be avoided for a clean image.
- Lower weights like (word:0.7) when the model over-suppresses desired detail.
- Combine several weighted lines to surgically remove clutter or odd elements.
“Weighting lets you fine-tune control and reduce common artifacts in diffusion.”
Mastering these techniques improves your outputs and makes stable diffusion generations look sharper and more intentional.
Leveraging Negative Embeddings for Better Results
Plugging a vetted embedding into your workflow hands the model a ready-made filter for poor output. EasyNegative is a popular embedding that encodes common exclusions. It helps the model avoid artifacts that normally need manual fixes.
Using an embedding simplifies your setup. Instead of long text lines, you load the file and keep your prompts short. That speeds iteration and raises overall quality of your images.
These embeddings act like pre-trained exclusion sets. They reduce noise, stop odd limbs, and cut stray text. The result is cleaner diffusion and more reliable final output.
- Applies learned exclusions automatically
- Reduces prompt length while keeping control
- Improves repeatability across runs
“A well-trained embedding gives the model a clear idea of what a high-quality image looks like.”
| Embedding | Main Benefit | Practical Effect |
|---|---|---|
| EasyNegative | Pre-trained exclusions | Fewer artifacts, cleaner faces |
| Custom embed | Tailored to your style | Consistent character features |
| Combined use | Layered filtering | Higher quality final results |
Common Mistakes to Avoid During Generation
A common setback is overloading your exclusion list so the model has nowhere creative to go. If you pack a long negative prompt with every possible ban, you often end up with bland, generic images.
Avoid contradicting your positive prompt. Conflicting instructions confuse the model and lower quality. Keep each line clear and consistent so the generation follows your intent.
Be specific but minimal. Vague exclusion lines waste time and leave artifacts or stray text in the final image. Adapt your wording for the model you use—SDXL understands natural language better and usually needs fewer exclusions than v1.5.
Practice saves time. Test short, repeatable exclusion lines and refine them per model. That control prevents distracting artifacts and improves landscape and portrait generation.
“Precise, model-aware exclusions let you keep control without killing creativity.”
- Don’t overload exclusions; prioritize real issues.
- Never contradict your positive prompt.
- Adjust rules for SDXL versus older stable diffusion models.
| Common Error | What to Do | Effect |
|---|---|---|
| Over-constraining | Trim exclusions to essentials | More variety, better composition |
| Conflicting instructions | Align positive and exclusion lines | Cleaner, sharper visuals |
| Vague exclusions | Be specific about elements to avoid | Fewer artifacts, less cleanup time |
Conclusion
, Finally, using targeted exclusions refines your workflow and improves final image quality. This approach helps you shape cleaner images and reach consistent results with Stable Diffusion.
Master the brief lines that list what to avoid. Apply short, repeatable prompts and a single compact negative line to block common artifacts. You’ll see better quality and fewer retries as a result.
Iterate often. Whether you use Stable Diffusion or a different model, practicing these steps will make high-quality image creation faster and more predictable. Experiment to find the balance that suits your style.
FAQ
What is a negative prompt library and why should you use one?
A negative prompt library is a collection of phrases you include to tell your image model what to avoid. You use it to reduce unwanted elements like extra limbs, bad anatomy, or text artifacts so your final images look cleaner and more professional.
How do negative directives affect the generation process?
Negative directives guide the model away from specific flaws during synthesis. By listing undesirable outcomes—such as warped faces, floating fingers, or noisy backgrounds—you help the model prioritize better composition and realism in the output.
What are concise general quality standards to include?
Include terms that discourage artifacts: blurred areas, over‑saturation, low contrast, noise, compression artifacts, and incorrect text. Keep entries focused and consistent so the engine reliably removes these issues without harming desired detail.
How can you filter inappropriate content effectively?
Add clear, specific exclusion terms for explicit material and illegal content, and combine them with moderation tools provided by your model host. Use layered filters: blacklist words, style exclusions, and safety classifiers to reduce risk.
Which phrases help refine anatomy and human features?
Use targeted exclusions like extra fingers, mismatched eyes, distorted proportions, and asymmetrical limbs. Also exclude unrealistic facial warping and merged body parts to maintain believable human forms.
What strategies improve realism in generated images?
Encourage realism by excluding painterly artifacts, hard edges from upscaling, and synthetic lighting mismatches. Pair those exclusions with positive instructions (natural light, accurate shadows, skin texture) for balance.
How do you eliminate common digital artifacts?
Block smoothing, banding, pixelation, and moiré patterns in your exclusion list. Specify no text overlays, no watermark remnants, and avoid repeated patterns that reveal generation seams.
How should you approach stylized and anime work differently?
For stylized art, avoid terms that force photorealism but still exclude errors like tangled limbs or inconsistent line work. Mention unwanted textures and odd color shifts that break the chosen style.
How can you manage facial features and expressions reliably?
Exclude asymmetric eyes, unnatural smiles, extra pupils, and missing teeth. Also specify neutral guidelines for expression intensity so emotions read naturally without distortion.
What are the best ways to perfect hands and fingers?
Use focused exclusions: fused digits, too many joints, malformed nails, and floating fingers. Combine with positive direction for realistic poses and correct finger spacing.
How do you address fused digits specifically?
Include precise terms like “merged fingers,” “webbed digits,” and “finger fusion” so the model learns to separate and render each digit distinctly, with proper joints and spacing.
How do you correct limb proportions in prompts?
Add exclusions such as elongated arms, stubby legs, and disproportionate torso. Reinforce correct anatomy with references to human proportion standards and pose consistency.
What helps improve grip and gesture rendering?
Exclude limp or clawed hands, awkward grips, and floating objects. Ask for natural finger curvature, contact points, and realistic weight distribution between hand and held items.
How do you use prompt weighting to emphasize exclusions?
Assign stronger weights or repetition to critical exclusions so the model prioritizes them. Use your toolkit’s syntax for negative weighting and test incrementally to avoid over‑penalizing desired traits.
What are negative embeddings and how can they help?
Negative embeddings are vectors trained to represent undesired features. Applying them steers the model away from recurring flaws more consistently than single phrases, improving repeatability across batches.
How do you integrate negative embeddings into a workflow?
Incorporate prebuilt negative embeddings from reputable sources, or train your own on examples of flawed outputs. Combine them with textual exclusions and iterate with validation images to tune effectiveness.
What common mistakes should you avoid during generation?
Avoid overly long exclusion lists that contradict each other, excessive negation that removes detail, and poor testing practices. Also don’t rely solely on exclusion—balance with positive guidance for best results.